english
hipster folders - in somewhat less than 10 steps
- auf Deutsch bei: http://typo.twoday.net/stories/931641/ -
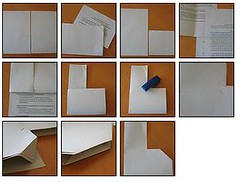
After listening to 'Getting Things Done' by David Allen (Amazon US) on tape in my car I am now also reading it - something I recommend.
I kept asking myself how to get hold of the Manila folders which Allen mentions - you can't get them in Germany. I also remember chatting with Ralf Graf who also complained about this fact. Allen also mentions you should not save scribble paper that has been printed on one side.
One morning while in bed I wondered if I could use all my old scribble paper to make folders.
The first design was composed of 2 A4 sheets kept together with far too much Scotch tape. This was awkward and slow and not stable enough.
The version in the flickr-set hipster folders is Model 3 (or 5) from the series ' 3 sheets and 3 staples'.
The flickr-set also has a description in English.
You need:
- 3 sheets of A4 paper - or any other size. 2 of the sheets should have 1 unprinted side.
- 2 hands
- 1 stapler with staples
- less that 1 minute per folder
0)
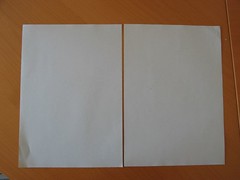
Take 2 sheets of A4 paper. Any other size will work, too.
At least one of the sides of these two sheets should have no printing on it. This side goes to the outside.
1)
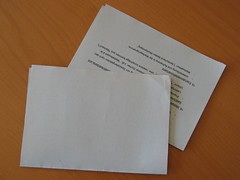
Fold them so that they form an A5 sheet and position the ' broad opening' upwards.
This will be the base of our folder and we use 2 sheets for stability.
2)
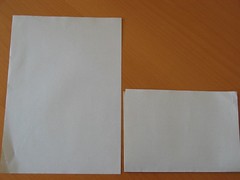
Now add the 3rd sheet and fold it lengthwise. Opening to the right, unprinted side outside.
3)-4)
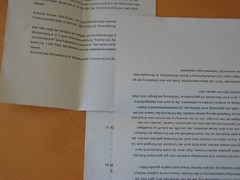
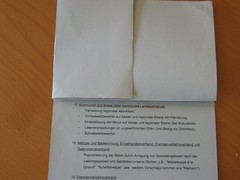
This is just for illustration. - The three leaves are joined to form an L.
'Manually' you can just insert the 'lenghty' sheet to the 'fat rectangle' bit so that both flaps of the lengthy bit are 'between' the flaps of the 'fat rectangle'.
5) +6)
Now we have an L with both the upper and outer rims of the 'fat rectangle' on the outside. We need to add stability now.
My first attempts were with Scotch tape but I found the production process too slow and awkward. Your mileage may vary.
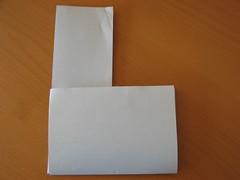
Apply a staple to both sides at the inner angle of the L.
This is the thing that gives eveything stablity.
7)
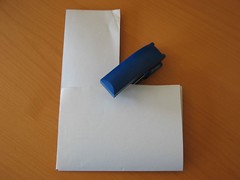
Apply another staple on the outer left rim. Try to catch both 'flapping' ends. Alternativley you can apply Scotch tape.
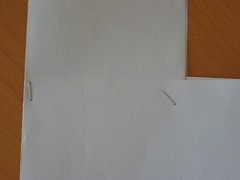
8)+ 9) Fold the edges of the 'tip' of the L.
Use your fingernails to give the creases a clear cut edge. At about 1/3 of the height of the L-bar.
This prevents inserted material from getting caught between the sheets.
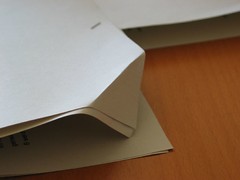
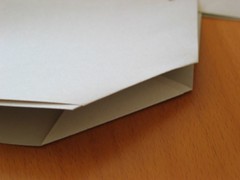
10)
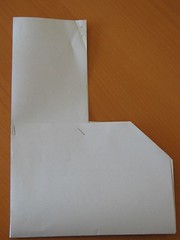
Finished
You can now write on the outside what you wanna use the folder for.
'to read'
Numbers from 1-31 and months from January to December for our tickler file.
Project names.
I punched holes in some of my folders so that I can file them in a binder (if their contents also are punched) or attach a binder clip to them.
I also made an experimental folder that is closed on the lower right side, but that design needs more refinement.
I'd be glad if you give me feedback on how you use the folders and maybe on how you make them differently. This is my third or fifth version of the folder and I imagine it will not be the last one. I'll keep you posted.
English also is not my native language. If there is anything amiss with sentences or terminology: Pease point it out :-)
For all you left-handers it might make sense to do it the other way round. Please give feedback ;)
My thoughts were:
* I don't want to throw away so much paper (which I printed on by accident).
* I want the folders to be cheap so that I don't hesitate to scribble on them or actually open an new one.
* If I don't have a folder I want to be able to produce one quickly - if need be also from unused paper.
* The material should be available everywhere.
* It has to be a quick process. It takes me 45 seconds or less to make a folder - time I can use to figure aout a next action... If you do 5 or 10 folders at a time (while your computer boots or while you are on hold at the phone - you might be even quicker.
I might even make a folder on the spot if I need one.
I store my folders in a stand-up box so that I can see when I need to make new ones. When I clean out odd collections of paper I set stacks of single-side printed paper aside for my folder-paper-stack.
Thanks to Ralf Graf / das-netzbuch.de for beta testing this while we were on a chat this morning. His positive reaction prmted me to go ahead and publish this now. I hope for some suggestions for improvement from y'all.
Again: All feedback is welcome.

After listening to 'Getting Things Done' by David Allen (Amazon US) on tape in my car I am now also reading it - something I recommend.
I kept asking myself how to get hold of the Manila folders which Allen mentions - you can't get them in Germany. I also remember chatting with Ralf Graf who also complained about this fact. Allen also mentions you should not save scribble paper that has been printed on one side.
One morning while in bed I wondered if I could use all my old scribble paper to make folders.
The first design was composed of 2 A4 sheets kept together with far too much Scotch tape. This was awkward and slow and not stable enough.
The version in the flickr-set hipster folders is Model 3 (or 5) from the series ' 3 sheets and 3 staples'.
The flickr-set also has a description in English.
You need:
- 3 sheets of A4 paper - or any other size. 2 of the sheets should have 1 unprinted side.
- 2 hands
- 1 stapler with staples
- less that 1 minute per folder
0)

Take 2 sheets of A4 paper. Any other size will work, too.
At least one of the sides of these two sheets should have no printing on it. This side goes to the outside.
1)

Fold them so that they form an A5 sheet and position the ' broad opening' upwards.
This will be the base of our folder and we use 2 sheets for stability.
2)

Now add the 3rd sheet and fold it lengthwise. Opening to the right, unprinted side outside.
3)-4)
This is just for illustration. - The three leaves are joined to form an L.
'Manually' you can just insert the 'lenghty' sheet to the 'fat rectangle' bit so that both flaps of the lengthy bit are 'between' the flaps of the 'fat rectangle'.


5) +6)
Now we have an L with both the upper and outer rims of the 'fat rectangle' on the outside. We need to add stability now.
My first attempts were with Scotch tape but I found the production process too slow and awkward. Your mileage may vary.

Apply a staple to both sides at the inner angle of the L.
This is the thing that gives eveything stablity.

7)
Apply another staple on the outer left rim. Try to catch both 'flapping' ends. Alternativley you can apply Scotch tape.

8)+ 9) Fold the edges of the 'tip' of the L.
Use your fingernails to give the creases a clear cut edge. At about 1/3 of the height of the L-bar.
This prevents inserted material from getting caught between the sheets.


10)

Finished
You can now write on the outside what you wanna use the folder for.
'to read'
Numbers from 1-31 and months from January to December for our tickler file.
Project names.
I punched holes in some of my folders so that I can file them in a binder (if their contents also are punched) or attach a binder clip to them.
I also made an experimental folder that is closed on the lower right side, but that design needs more refinement.
I'd be glad if you give me feedback on how you use the folders and maybe on how you make them differently. This is my third or fifth version of the folder and I imagine it will not be the last one. I'll keep you posted.
English also is not my native language. If there is anything amiss with sentences or terminology: Pease point it out :-)
For all you left-handers it might make sense to do it the other way round. Please give feedback ;)
My thoughts were:
* I don't want to throw away so much paper (which I printed on by accident).
* I want the folders to be cheap so that I don't hesitate to scribble on them or actually open an new one.
* If I don't have a folder I want to be able to produce one quickly - if need be also from unused paper.
* The material should be available everywhere.
* It has to be a quick process. It takes me 45 seconds or less to make a folder - time I can use to figure aout a next action... If you do 5 or 10 folders at a time (while your computer boots or while you are on hold at the phone - you might be even quicker.
I might even make a folder on the spot if I need one.
I store my folders in a stand-up box so that I can see when I need to make new ones. When I clean out odd collections of paper I set stacks of single-side printed paper aside for my folder-paper-stack.
Thanks to Ralf Graf / das-netzbuch.de for beta testing this while we were on a chat this morning. His positive reaction prmted me to go ahead and publish this now. I hope for some suggestions for improvement from y'all.
Again: All feedback is welcome.


